In my previous story, I described some lethargy I’d been feeling, and my solution, which was buying a minibike and planning to hot-rod it inappropriately. I set a budget of a grand on this thing, and I stuck with that. (Spoiler alert: I came in over budget. $1,200 or so was the final tally, not counting oil and gas.)
I also kept the un-fired Honda clone engine I pulled out of this minibike, so I could definitely sell that to cover the overage. (But I just bought another chassis and built that engine, and now have multiple fast minibikes.)
As I mentioned last time, my goal for going fast was largely via more revs. Almost all Honda/clone/Predator engines are governed to somewhere around 3,600 rpm, simply to keep them alive. The temptation to spin any engine beyond its max is a great one. With no tach, no rev limiter, and too little power for adults who are hungry for more juice, blowing up a minibike motor is usually a pretty easy task if the proper precautions are not taken.
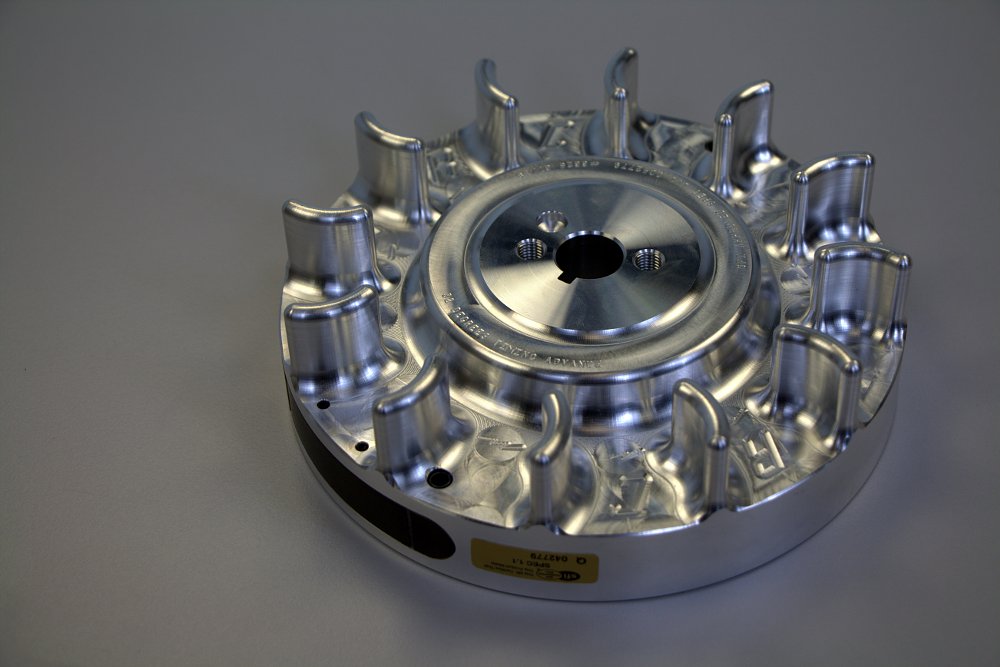
Overspeeding components is a safety issue. The most volatile items in a stock clone motor are the flywheel and con rod. I grabbed billet replacements from ARC Racing. This flywheel is tested for 60 straight minutes at 12,500 rpm. The flywheel is a billet item that has eight degrees of additional timing advance built in — very helpful for an engine that will be spinning at nearly twice what the manufacturer intended. (It’s also a bit lighter.)
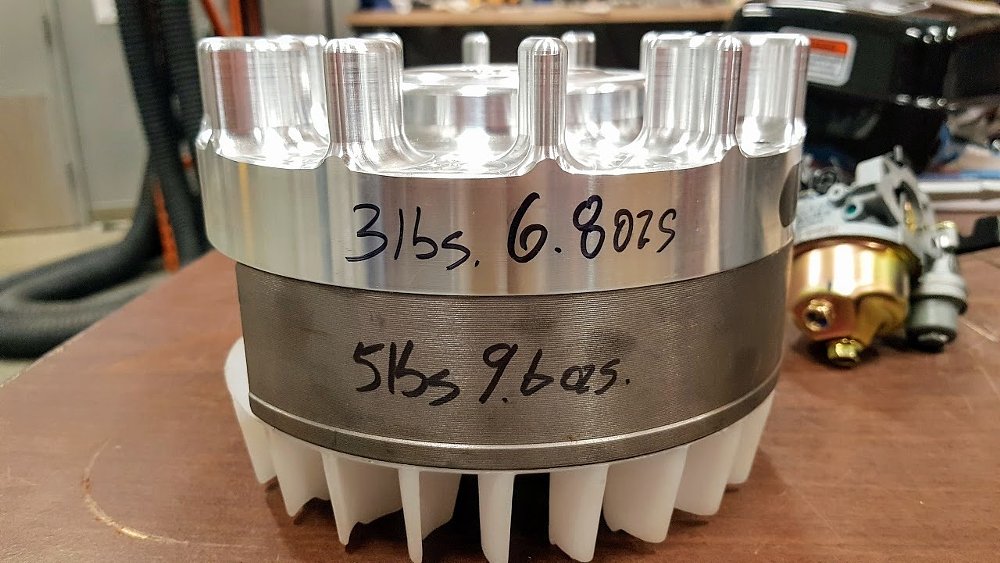
The ARC wheel was made here in America, and has a stronger magnet than the stock one, providing a stronger signal to the coil. Lastly, it has about half the fins of the stock plastic fan, which is said to free up some power.
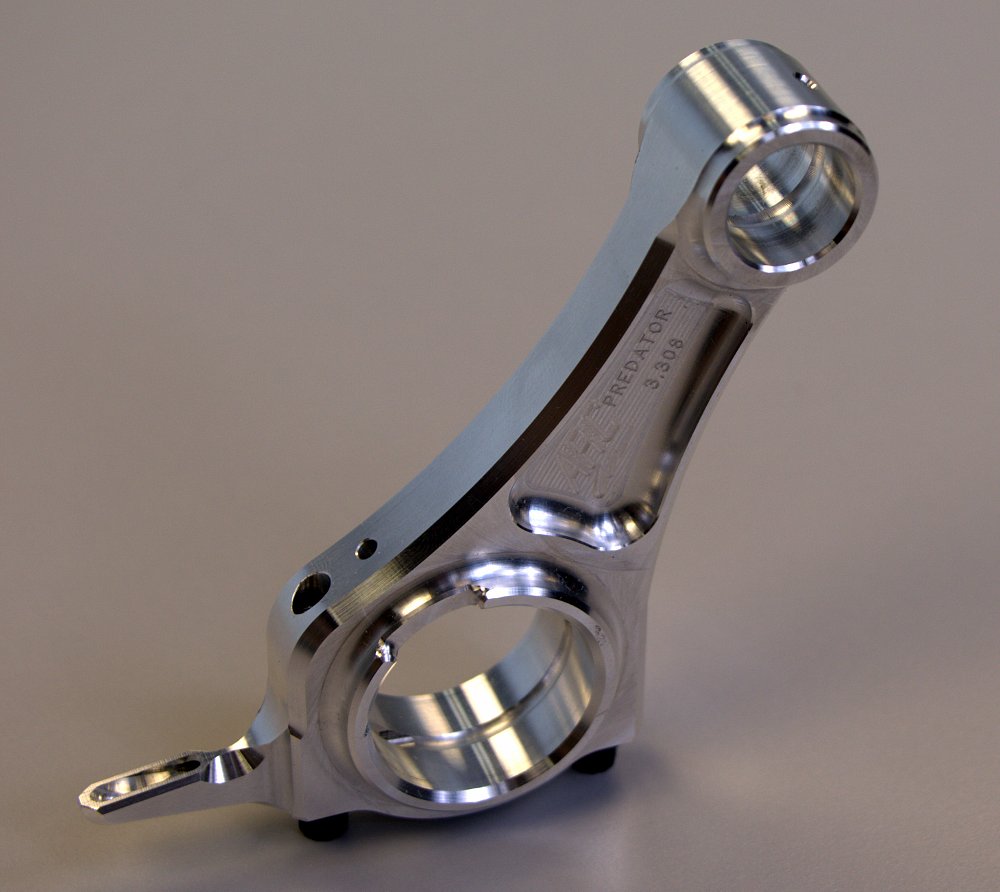
The connecting rod is also a billet ARC piece, with hardened rod bolts, beautiful machining, and a set of big end bearing shells. Most importantly, it… you know, won’t blow up.
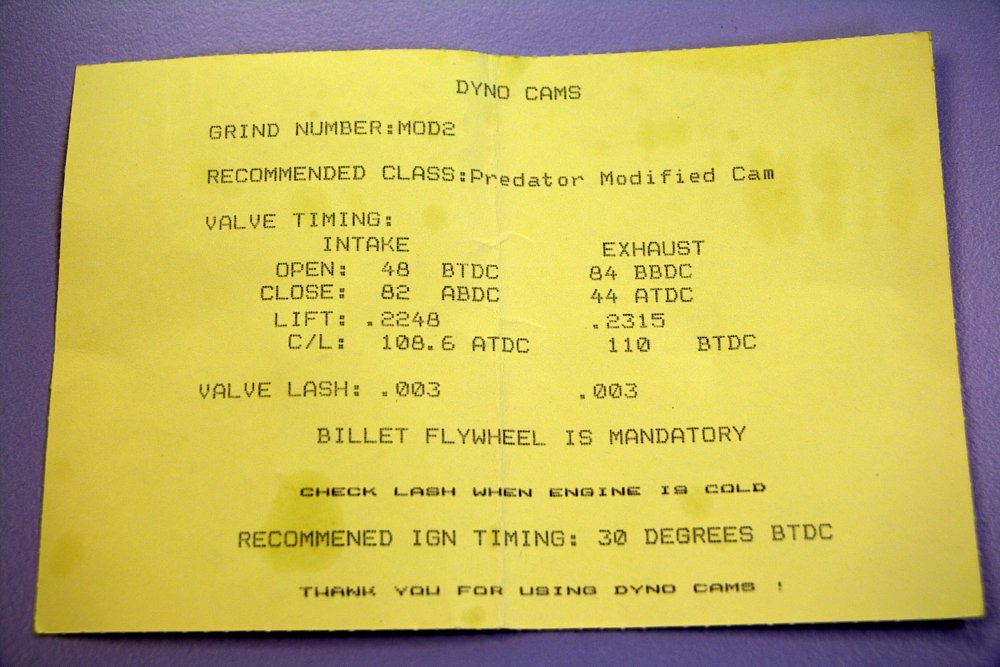
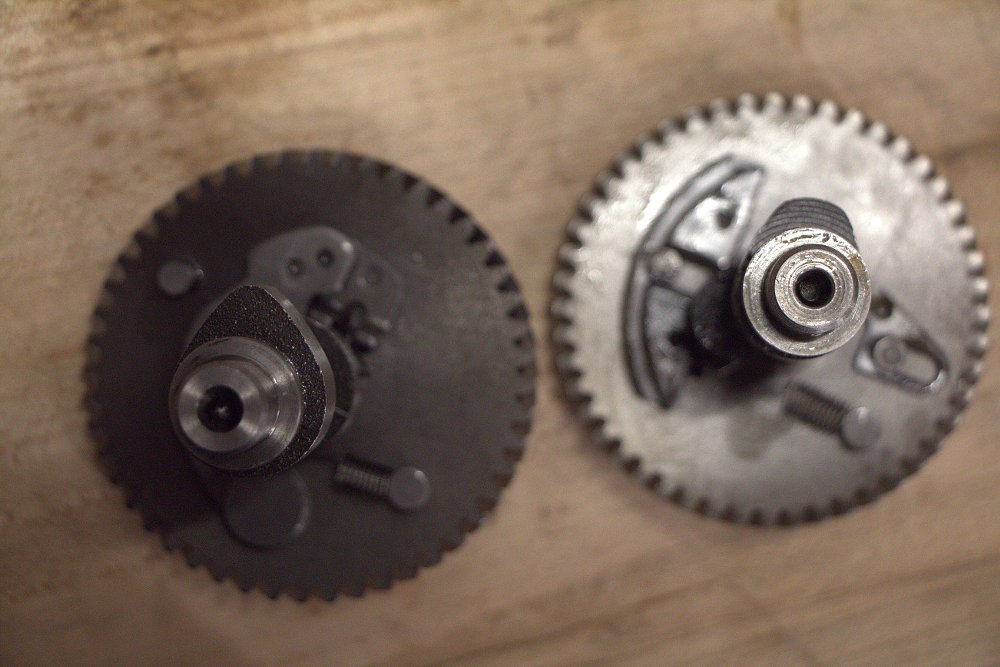
I also got a Dyno Cams camshaft. The grind is a MOD2. The target for this cam is 7,000-8,500 rpm, and it appears to achieve this mostly with lots of duration, which is a classic method to achieve better high-rev performance. This cam was right on track with what I wanted to build.
The MOD2 requires 18-pound valve springs. After talking to the folks at Dyno, they seemed to think higher rpms would be better supported with more spring pressure, so I picked up a set of 22-pound springs, since I planned on spinnin' this poor motor to the moon. Factory springs are in the vicinity of 11 pounds. Springs at that pressure allow valve float around 5,500 rpm. (Valve float is when the cam spins fast, but the valves stay open because the spring is not strong enough to snap ‘em shut quickly enough.)
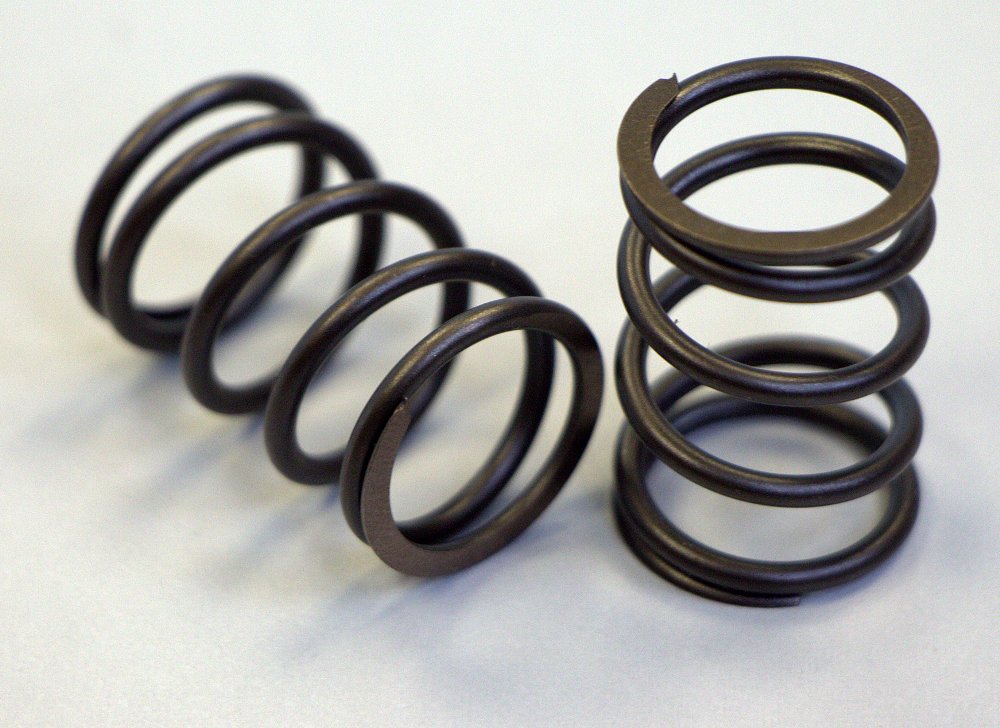
I found that 18-pound springs are the same diameter wire, but a taller spring. This was not what I wanted. Yes, I’d get increased spring pressure, but at the cost of faster coil bind. My cam was at stock lift, but by using the 18s, I’d give up my margin of coil bind error for increased spring pressure. The 22s had similar installed height to the stockers because they were made of heavier gauge wire. The 22-pound springs were actually cheaper, too. (Only eight bucks… but with $8.30 shipping cost. Story of my life.)
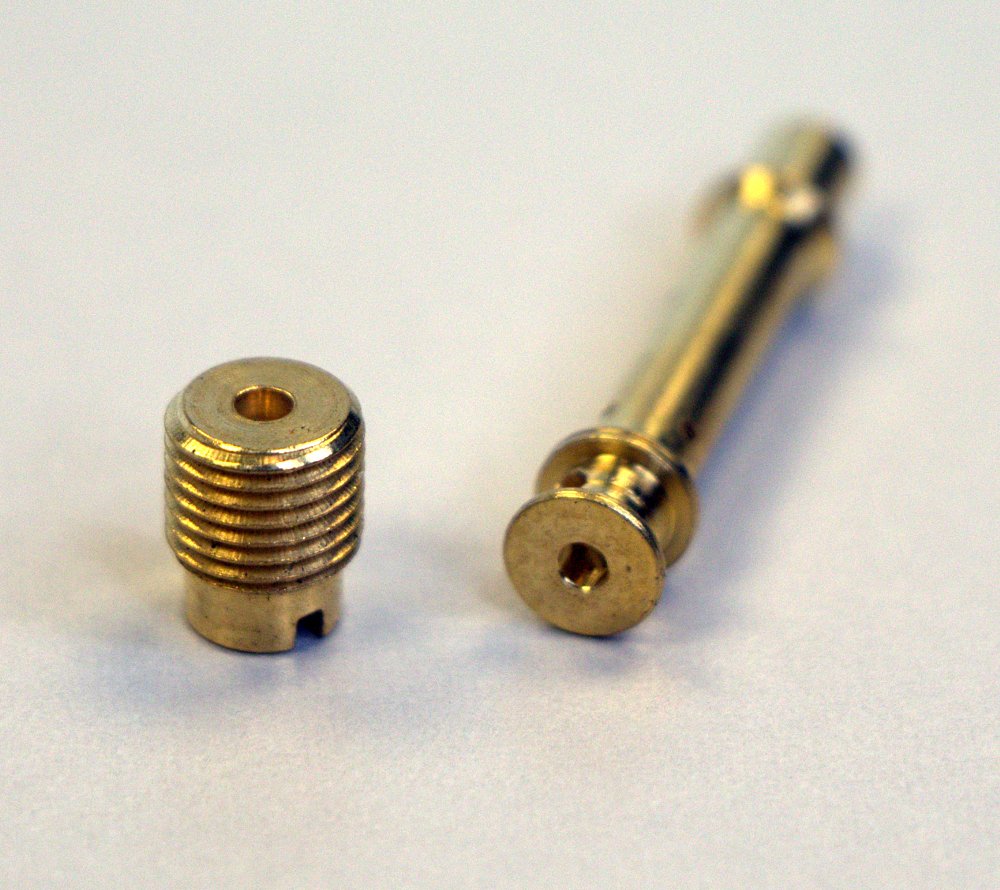
Finally, I acquired a few bolt-on items to install. I got an intake with a very nice funnel, and big honkin’ high-flow air cleaner to bolt on as well. For the carb, I'd planned on using a bigger emulsion tube as well as bigger main and pilot jets. Stock sizes are a 0.015-inch pilot and 0.028-inch main.
Breakdown
Pulling apart the stock Predator was a joy. Everything was nice and new, and the quality of these engines is just through the roof. It’s crazy how nice a cheap engine like this can be. Joe Z., one of the ZLA mechanical whiz kids, was also pretty impressed by the quality. He has an ungoverned Predator motor in his minibike, but his came that way, so this was the first time either of us had pulled one of these apart. I yanked off the airbox, exhaust, and carb right quick, and then we were looking at the motor itself.
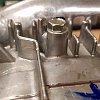
We had to wrestle the flywheel off. (We used some pryin’ action with hammer tippy-taps on the mainshaft with the nut threaded back on… if you do this be careful! Oddly, there are no threaded holes on the factory flywheel for a puller. Guess they either expect us to do what we did, or just junk it and buy a new motor if the flywheel should need to come off.) We also wound up using the jaws of our vise to hold the crank output shaft so we could zip off the nut holding it. (Had we been in either of our shops, we’d have kissed it with an impact, but the ZLA compound does not have pneumatic tools. And yes, we used wood blocks to prevent marring the shaft.)
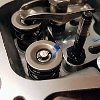
Piston crosshatching was gorgeous, and there was even some assembly oil in the engine, presumably to keep rust at bay. (Everything was very nice, really, with the exception of the flywheel, which was beginning to rust. I think it’s made of grey iron.) I found automotive-style valve keepers holding the valve springs in place. That style is more robust, anyway, so the only downside to that unexpected mechanical inclusion is that a home mechanic may need to buy or make a tool to compress valve springs.
The crank runs in roller bearings, but the connecting rod itself serves as the bearing surface. Happily, our replacement billet unit runs in plain bearings, so that was a nice longevity upgrade to add to our engine. Both the stock cam and our hot-rod unit have automatic decompression units acting on the exhaust valve. And the factory head gasket proved to be 0.010 inches, meaning our compression ratio couldn’t easily be raised without milling the head… but even stock we were looking at 8.5:1. This engine has a lot going for it out of the box.
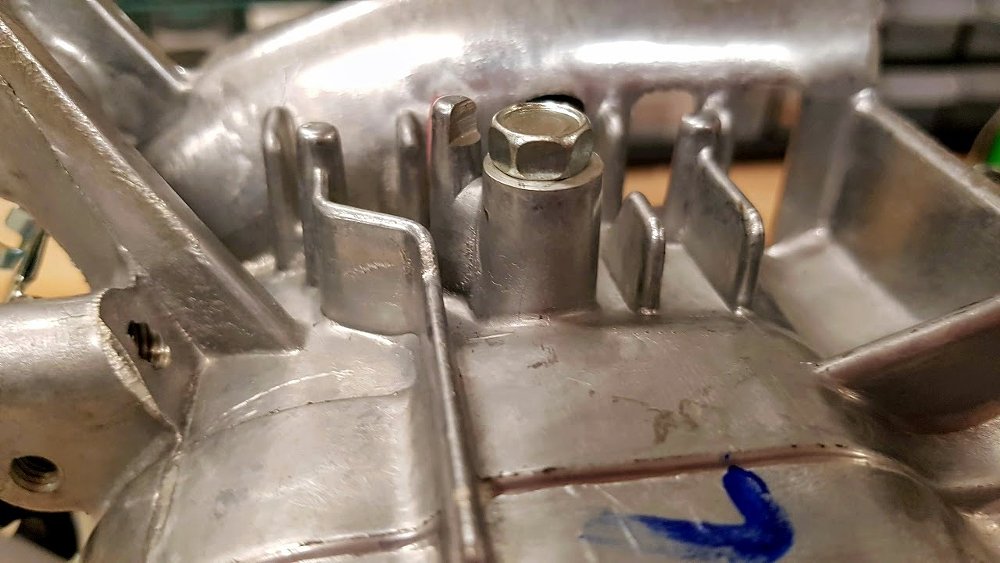
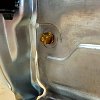
I broke it down while Joe put together the other chassis and pulled the 196 mill out of the bike. After I busted the Predator down to its component bits, I started prepping the case. Since I was pulling the governor and the governor’s actuating arm, I filled those holes in the case with a pair of 0.25-inch bolts. I also yanked the low-oil level float and associated switch and wiring and plugged that bit of the case with a 0.125-inch NPT pipe plug.
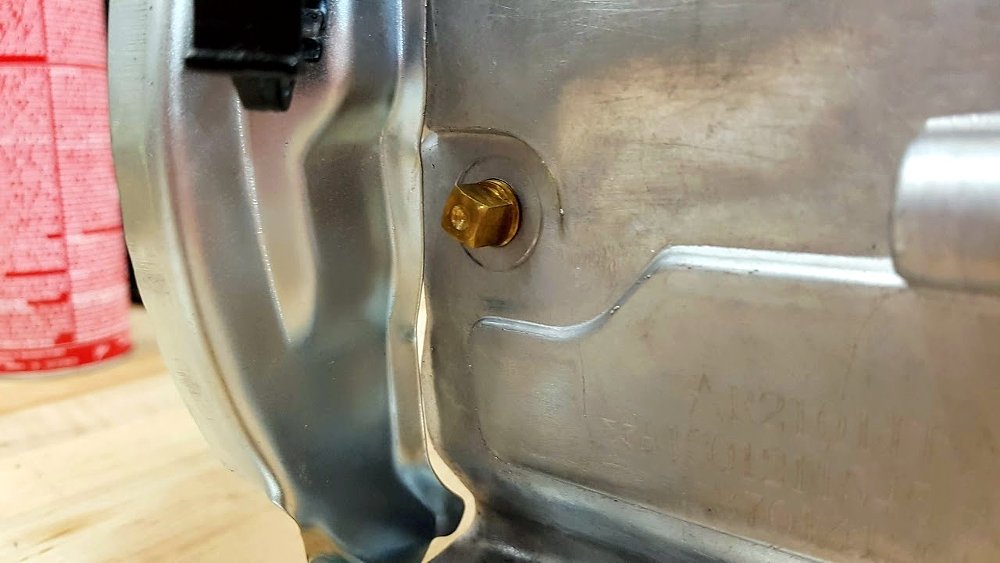
I also removed the kill switch from the Predator engine, as the bike already has a handlebar-mounted kill switch, which seems slightly safer. I also swapped the Hisun engine’s drain bolt extension over to the Predator case to clear the engine mounting plate so oil changes aren’t messy.
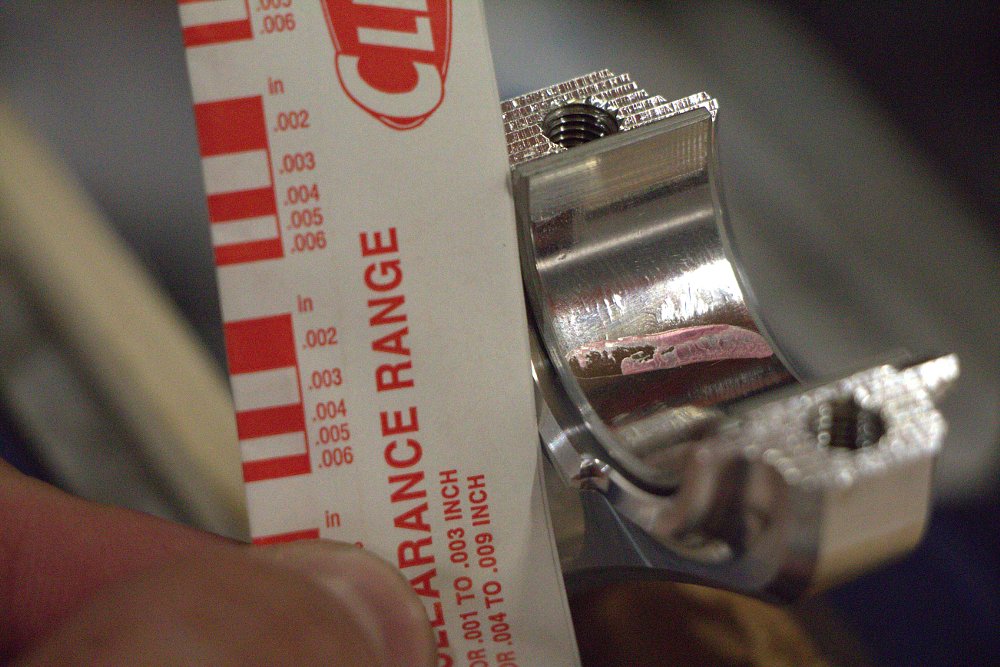
Reassembly went smoothly, beginning with the connecting rod. We checked the main bearing shell clearance and it was spot-on. The only thing I had trouble with was the direction of rod, piston, and crank! I had no manual and was working from memory. I even wound up checking a YouTube video to confirm my suspicion I had installed the rod flipsy-daisy. (I had!) I rectified my error, torqued to spec, then popped in the cam and buttoned up the cam chest. After that, I focused on the cylinder head.
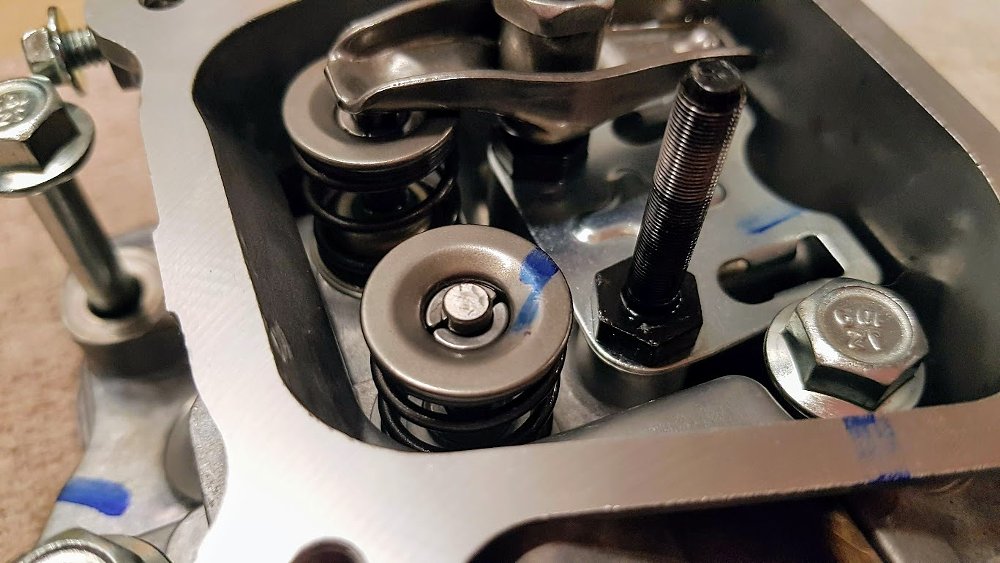
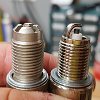
As I mentioned earlier, those valve springs had standard keepers holding the retainers in place. I was unsure if I could replace the heavy valve springs by hand, so I employed a valve spring compressor. I also popped in a new sparkin’ plug, an Autolite AR3910X. It’s actually a surface gap spark plug. I’d been reading that this plug was the hot ticket for these engines, which made little sense to me. I’m not a fan of gimmicky spark plugs, especially the ones with multiple ground electrodes. It’s a gimmick. Electricity is lazy. It takes the easiest path it can, which means it finds one electrode and generally runs the spark to that electrode pretty much all the time.
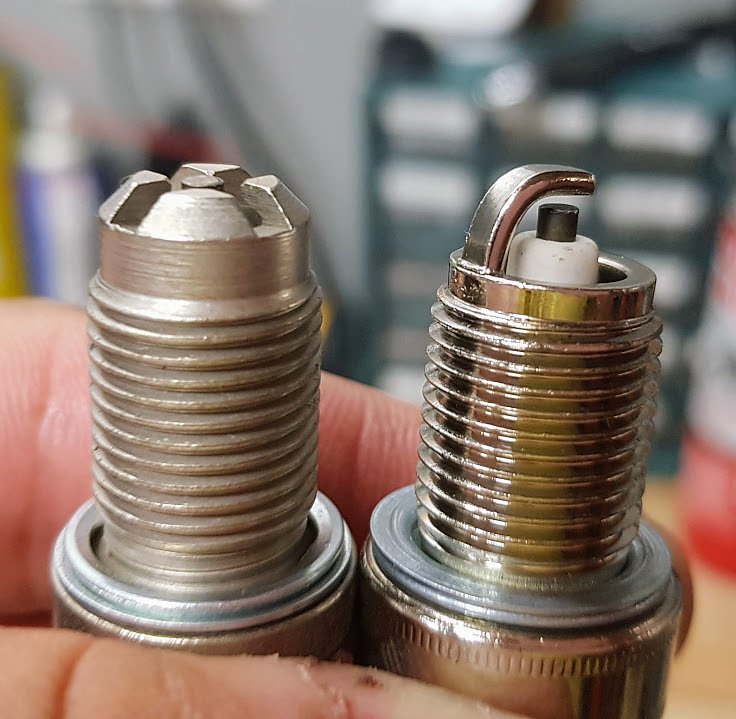
I came to find out the reason for the plug’s popularity has to do with surface gap design, though not in the way you’d expect. This plug by Autolite is significantly larger than a standard plug. It physically takes up more room in the combustion chamber. I never thought about this, but when you’re working with a combustion chamber that’s only 22 or 23 cc, every little bit counts. I wasn’t looking to make major compression changes on this engine, so it was a nice easy way to nudge the compression north ever so slightly.
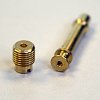
After my new snapper-shutters were in place, I turned to the flywheel. Using some valve-grinding compound, I lapped the flywheel to the crankshaft, installed the key, and locked it down. Next up was the carby, which got a new pilot jet, main jet, and emulsion tube. At this point, it was time to drop it into the chassis.
At this stage, I jetted the carb, made a new linkage for the throttle, and put everything back together. I used a 0.020-inch pilot jet, an emulsion tube from a Honda GX140 engine (which mixes a bit less air), and a 0.037-inch main jet. When I made my throttle linkage, I set it up to have a pretty quick throttle — it’s not even a quarter-turn.
We ran into a little snag at the end because my clutch wouldn’t go on the output shaft. The Predator is a 0.75-inch output shaft, which is fairly common, but the outgoing Hisun engine had a 0.625-inch shaft. By some miracle of kismet, I happened to have a new 0.75-inch shaft clutch I had ordered incorrectly, not knowing it was wrong. I kept it because it was easier than trying to return it, and I was glad I did! (Add another $34.99 to the bill.)
Joe was razzing me that it wouldn’t start. He gave me 10 pulls to get it going. Searching for the compression stroke did not count for pulls. It started after five! (Watch the video, there are some predictably hilarious results.)
How it rides
There is a reason minibikes are not built like this.
The bike fired up again outside, and I started running it around. The muffler fell off immediately, and the header pipe bolts loosened up. After repairing those items, we ran it a little more. The muffler loosened again, so I removed it. It was loud! But the bike still ran well, especially high in the rev range. In fact, hearing that engine spin to the heavens made me glad I popped for the fancy con rod and moreso the flywheel — I could see the stock flywheel doing major damage if it came apart at those engine speeds.
The mini has more power all across the board. Midrange and top end are especially strong. The muffler, it turns out, was good for a one mph restriction at the top end. All told, with no muffler, this bike increased to a GPS-verified 41 mph — but it has a little more bottom-end oomph with the muffler, and it’s way less irritating. (In my original calculations, I had guessed with my weight and gearing that this bike would reach 35 to 42 mph, so I was pretty close in my estimates.) I’m pretty sure I’m now putting out more power (comfortably!) than my kid’s Grom. (Stinky should still be besting me handily, though — he has a transmission with multiple gears, suspension, and about a 160-pound weight advantage!)
The quick throttle I engineered bit me. I was starting the bike with my hand on the throttle, and it shot out from underneath me, pointing both wheels sky-high! I crushed a fender, an air cleaner, and rashed some brake hardware. I pulled those pieces off my stock machine so I would still have a nice-looking rider (for a little while!). I didn’t feel compelled to add those to the bill as they were due to my own stupidity, but they were very definitely casualties of this project that cost money.
I had some little tuning things to attend to. I reworked the throttle with a much stronger return spring. I had a little cable re-routing to do. I re-clocked the recoil starter so I could pull from behind the bike while employing the brake! (Two unplanned acceleration events sans rider forced my hand.) Other than that, though, this was not a hard bike to build or get on the road. It is, however, difficult to ride. The chassis and tires are simply not made for this level of power. In short, it came out exactly how I wanted it — super-sketchy and able to put a grin on the surliest of greybeard riders.
I wound up drilling the lawn mower muffler I had. It was quiet, which was nice, but it was obviously choking off the engine. I think there is now a nice compromise of top-end capability and muffling, and I got back some low-end power. I needed to do some rejetting, too. I still can’t really believe how fuel-hungry this engine is. The pilot jet finally was happy at 0.024 inches. And on the main, look out! The stock jet was a 0.028-inch. I originally tried a 0.037-inch, and even that was too lean. At long last, a 0.0394-inch finally got my plug looking good. (The leaner jetting was good for more speed, but seeing a snow-white plug made me very nervous!)
Finally, I slammed a set of racks on it. I can comfortably carry a lot of beer now.
Conclusion
This was a stupid project, but a very fun one. For pretty short coin, I have one of the fastest minibikes I’ve ever seen operational outside of YouTube. Sure, I could have thrown the money at a larger used motorcycle or something else that was faster/better/had suspension, but this was a neat little bit of work that was easily done in spare time. The clone motor I pulled out has already been built into a nastier powerplant than this one. (It got a Mikuni round-slide VM22, and was shoved into a smaller chassis with taller gears.) By the time you read this, that lump will be sitting between some frame rails, occasionally ferrying a very fat man around, giggling like a little kid between sips of beer.
And now I seem to give a shift once again, despite the fact I only have one ratio.